Online Learning Resources 

As online search and reading come easy to me, I’ve depended on them regularly for varied learning. In the area of mosaic based orientation, I’ve found these websites and blogs to be wonderful resources, and I recommend them highly for beginners to read, reread and use the shared ideas for their mosaic experiments. All the tutorials and advice are made available free of cost here so when combined with a good book, a helpful online group and regular hands-on practice, they would amply support a mosaic learner’s quest to gaining confidence in the art of mosaic-making.

The Mosaic Store
This Australia based mosaic supplies store website is a wonderful resource for learning to mosaic. The website’s blog carries How-to project tutorials, tips and primers on tools that all beginners to mid-level mosaicists would find immensely useful.
http://www.themosaicstore.com.au/blogs/news

The Mosaic Supply Store
This US based mosaic supply store website is an ocean of ideas, primers and clarifications on all matters mosaics. Its owner Joe Moorman mentions this as his site’s mission statement that resonates with me entirely:

One of our most important goals is to promote contemporary mosaic as a fine art and encourage ordinary people to make original mosaic art in their own style. 

The FAQ itself is an exhaustive resource and must be referred to by all levels of mosaic practitioners.
https://blog.mosaicartsupply.com
https://mosaicartsupply.com/frequently-asked-questions/

I-C-Mosaics
The site owner Lou Ann Weeks runs an online mosaic supply store and writes this useful blog that covers the basics of mosaic-making. Her videos and posts promote her recommended mosaic consumables but one can still learn much about the general art and technique of making mosaics from her site.
http://i-c-mosaics.com/blog/articles.html#.WL704fmGOUm

Glass Campus
Dennis Brady started building this resource on glass fusing, cutting, selling and more when he saw that he had to work so hard to find the right information on techniques or tools. He built this website to share tutorials to promote free education to all. Most tutorials are focused on stained glass based techniques but a mosaic learner would find a lot of material of interest too.
http://glasscampus.com/tutorials.htm

Helen Miles Mosaics
There are a couple of blogs by mosaicists that I follow with interest. This one tops that list. Do read through the blog from its oldest to the newest post and enjoy Helen’s humour as also the knowledge she shares through her posts.
http://helenmilesmosaics.org

Let me know if I’ve missed any helpful mosaic learning resources that must be included in this post.

Mosaic Tools in India

Since my last 3 posts on mosaic tools, I have the following update and leads to pass along:

Sai Mosaic Art

This company has now begun selling the following tools and accessories from its website:

. Wheeled nippers
. Replacement blades for wheeled nippers
. Nippers for shaping ceramic tiles
. A set of 4 picks
. Fibre-glass mesh by meter

Their nippers and picks are available through Amazon India as well.

If the website’s payment gateway gives any problem, contact them on their email with your requested items.

Website: https://saimosaicart.com/

New Bombay Hardware Traders

NBHT has begun to stock all the tools necessary for handling ceramic tiles. The tool listing is as below with the prices as of December 2016:

Rubi 5975 Hand Held Tile Cutter
MRP: Rs. 685.00
Discounted Price Including Tax: Rs. 622.00
More Details at: http://www.rubi.com/en/ten-bric-manual-cutter-r25

Rubi 71970 Nippers for Glass Mosaic
MRP: Rs. 2,772.00
Discounted Price Including Tax: Rs.2,517.00
More Details at: http://www.rubi.com/en/nippers-for-glass-mosaic-r362

Rubi 65926 Nippers for Ceramic Tiles
MRP: Rs. 1,419.00
Discounted Price Including Tax: Rs.1,288.00
More Details at: http://www.rubi.com/en/nippers-for-ceramic-tiles-r361

Rubi 83942 Nippers for Porcelain Tiles
MRP: Rs. 3,689.00
Discounted Price Including Tax: Rs. 3,350.00
More Details at: http://www.rubi.com/en/nippers-for-porcelain-tiles-r358

Rubi 65925 Parrot Nippers
MRP: Rs. 2,307.00
Discounted Price Including Tax: Rs. 2,095.00
More Details at: http://www.rubi.com/en/parrot-nippers-r359

Rubi 12969 Manual Tile Cutter
MRP: Rs. 8,432.00; Discounted Price Including Tax: Rs. 7,656.00
Video at: https://youtu.be/bHLR8R9XUMA

For purchasing any of these tools, an email to the Sales Head, Mr. Akshay Jain (akshayjain at nbhtpl dot com) would get you the company bank details for making its payment. The tool would be couriered to any city in India.

Website: http://www.nbhtpl.com/contact-us

Lastly, it’s good to see that Amazon India has been enlisting mosaic media suppliers but it’s also disappointing to note that other than Sai Mosaic’s products, most other items are prohibitively priced. For now, one can buy mosaic books from them and wait till their product range increases and is priced better.


Interview with Anjali Venkat, Glass Artist

Please give us an introduction on yourself.

Like a lot of women, I play very many roles, daughter, daughter-in-law, wife and mother. I think it’s my free spirited nature and artistic soul that has made me enjoy my journey so far. I’m a glass artist with an eclectic sense of art and design. I have a passion for all types of art and craft. I’m nosy; I’m interested in people and what they do!

How did you stumble onto mosaics and how long ago was that?

As a kid I would visit Rock Garden in Chandigarh often. I would collect broken tiles, mirror and bangles and stick them on my cupboard, cut magazine papers and make a collage.

 Assembling bits and pieces together has been a life long effort for me.

 I’ve dabbled in block printing of sarees, painting dupattas, pottery, painting, designing carpets, bookcovers and making stationery. I use the word dabbled, perhaps wrongly… for very many years these pursuits were my source of income. But once I started working with glass I stuck with it. It’s a difficult medium and I love the challenge of it.

I have formally worked with glass for over 20 years. Initially I used to sell my paintings to make the money to buy glass and tools.

I’ve run a glass studio in Chennai for very many years. I’ve shifted base to Singapore and run a studio there today. I visit Chennai twice a year and teach mosaics there.

What is your preferred mosaic media? Do tell us about any challenges you face in its sourcing or stocking.

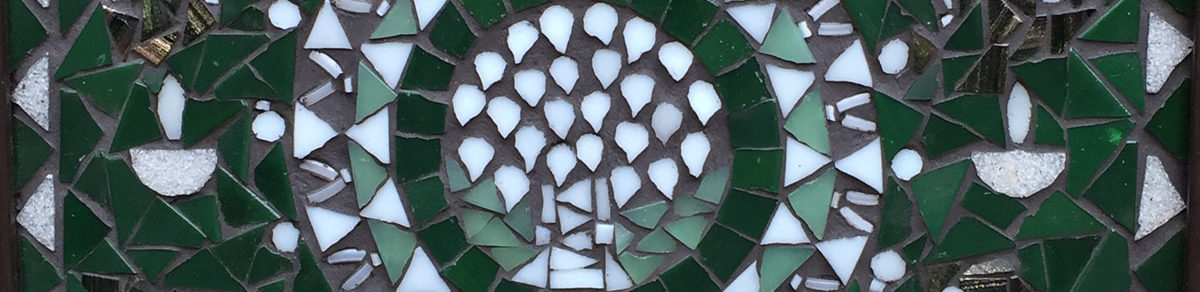
I am a glass artist. In my mosaics, the main materials used are always glass. I like to incorporate the unusual and unexpected into my work.

When I started working with glass many years ago, I had to rely on books…. No classes, no internet with its fountain of information. And the books were expensive!

My supplies were dependant on a visit abroad. My dear husband used to lug around sheets of coloured glass and baby diapers from all over the world!

I strongly believe that lack of resources make one more resourceful.. a lot of my work today, like using broken glass bottles, broken mirrors etc is a direct result of not being able to source readily available materials.

With today’s flattening of the world, information, guidance and supplies are easily available.

Mosaicist to a large extent are hoarders. Bit and pieces are collected over time with an idea that it might be useful in some design. This can sometimes become overwhelming. Regular sorting and pruning of supplies is essential to keep both mind and space clutter free.

What all have you made in mosaics?

I’ve mosaicked a whole bunch of things including 2’ square planters, dining tables, smaller tables, wall art, jewelry etc

What are you currently working on?

 I love what I’m working on currently. I’ve been teaching seniors at an activity centre in Singapore the joys of mosaic. The theme for the Project is ‘JOY’

Over a period of 7 sessions, the seniors have played with glass shards and tiles, drawn out and coloured what brings them joy and then assembled the mosaic on net. Initially they were a bit hesitant exploring this new medium but over time their eagerness, ideas and enthusiasm grew. Each one of the 23 participants has made a petal shape and a few leaves. I’ve assembled them into a garden of flowers. Each petal showcases what the seniors like. I fused little birds, flowers, butterflies, a dog, fish and a house with a red roof. These designs were made on the basis of their drawings. I’ve fused their names too! 

This has been a hugely enriching experience for me and I’m grateful to be part of it.

Where do you find inspiration for your compositions? What kind of themes interest you?

As I mentioned earlier…I’m nosy. I pay attention to sights, sounds, patterns, colour … basically I pay attention to the world around me! I think in the abstract, so my work reflects that. I almost never make true to life subjects, its always my version of what I see/perceive.

What is the typical size of your mosaic pieces? How long does it take you on average to complete a mosaic?

 The size of my art work depends on whether it’s a commission or something for fun. I advice my clients about suitability of size, theme, colours etc but if it’s a commissioned piece ultimately the final decision lies with the clients.  Over time, I’ve developed a clientele that likes to buy my pieces off the shelf. They finally trust my judgement!

 Time taken depends on how much time I get. Some projects have a tight deadline, others are more relaxed. I personally like to start a project and finish it as fast as I can.

Do you mosaic every day and for how many hours? Do describe your work area.

Today, I run a glass studio in Singapore. I work and teach there. I work from 10 am to 6 pm mostly 5 days a week and often teach on weekends. My work schedule depends on what I have on my plate.

It sounds like I have no life at all but for me it’s actually not work!

I have people dropping by the studio regularly and enjoy the interaction and different points of view and style of working of my students.

I have designated areas in my studio for mosaic, stained glass and glass fusing-kilns and try to keep things organized, but of course that’s easier said than done!

What challenges have you encountered in mosaic-making?

I think my personal challenges have always been in sourcing something standard that just works… Like, one just goes to X shop and gets Y material and moves on to the fun part of design etc.

I’ve moved around a bit and have had to scout around for certain materials wherever I go… cement, grout etc. These are not commonly used materials and the average person just doesn’t know enough to help.

Many individuals even without much exposure to art-creation or training, seem to gravitate towards mosaic-making to find mental peace.  Do you feel that way? Why is that?

Mosaic is therapeutic. There is something about placing one fragment after another to make a whole, that is engrossing and very satisfying. The only thought is what piece comes next, the colour, shape or size. The act of making mosaic clears the head of all the incessant chatter… a sure-fire path to mental peace.

What is your advice to a new mosaic learner based in India?

Making mosaics is picking up rapidly in India and three cheers to that.

There is so much information out there, but one does not have to follow what a hundred other mosaicists have done. There is no point waiting for all the materials that we read about to magically materialise. Take the effort to explore new possibilities.

Experiment.. Find a new way. This is also in terms of design and style. While I believe, there is nothing really original in this world, it’s nice to put one’s own spin into things. Always remember to enjoy the journey, not only the final finished artwork.

There will always be a new tool that supposedly cuts down work to half, or some shiny new material but it’s good to remember that actually most of that does not matter. What matters is what the mosaicist makes out of what is available. Their passion for their work.

Nek Chand’s Rock Garden, in Chandigarh and Isaiah Zagar’s Magic Gardens in Philadelphia are proof of that.

What is your view of the Facebook group Mosaic India and its website? What kind of content would you like to see on it in future?

I like this group and enjoy being part of it. I’m happy to pitch in and clear any doubts that I can. However I think it would be nice if anybody posting pictures of finished work explains a bit of what they have used and how they have made it.

I think this page is not a page to show off one’s work; most people have their own FB page for that. And there are enough pages to drool over mosaics and other inspiring artwork.

 It’s for sharing knowledge.

Post a Mosaic related query and people who can and are willing to help should answer, without any prompting from the admin.

Post a photo of your work only if you also describe the process and materials used a little bit, again without any prompting from the admin.

A lot of us, including me, earn a living making mosaics. It’s not fair to expect us to give out all our ways of working, taking workshops, pricing and finding a market. Which is why some questions do not get answered. That’s totally acceptable to me. However if I post a picture of my work, I should be prepared to let people know how it is made.

Do you teach mosaic-making or will do so in the near future? If yes, please mention your city.

I teach Mosaics regularly. I have a couple of types of workshops that I conduct in Singapore, including for schools and other groups.

The age group is from 5+ to 80+ years.

I visit Chennai twice a year and teach Mosaics there. In a few days time I’m going to be teaching an intensive Mosaic workshop in Bangalore.

What do you aspire to do as a mosaic-maker over the next 5 years?

I want to be more involved with community projects and teaching; spreading the joys of making mosaics.

Please mention your preferred way for people to reach you.

 Email: anjalidesign9@gmail.com

Is there a gallery link or website of your mosaics that you would like to share with others?

 www.anjalidesign.com
FB Anjali Design   https://www.facebook.com/anjalidesignglass/

Please share some of your favourite mosaics from your creations. Is there any story about them that you would like to share?

My current two favourite mosaics are community projects. One at the Science Center in Singapore, where I was a Maker in Residence early this year. Visitors to the center irrespective of age made a small mosaic. I assembled all the pieces to make one big mural. It was great fun for me to show people how to cut glass and fit pieces together to make a whole.

The second is the Mosaic made at the senior activity centre, which I mentioned earlier.

While conducting these projects I try and make small personal charms for the participants so they can identify their handiwork in the midst of hundreds of other contributions.


The questions were compiled by Jyoti Bhargava and the interview was carried out by email.

Interview with Shilpa Dalal, Mosaic Artist and Painter

          It’s hard to know where to begin.  I studied Commercial Art in college and that is where a large part of my art knowledge comes from.  The rest is self-taught.  I married quite early, and because we were going to be moving all over the world, I did not work.  However, to keep myself busy I started painting in oils and and in those days I did a lot of stained glass painting.  I had some transparent glass paints and tubes of black liner and was able to do quite a few projects in those days.  I was quite busy with some project or the other, either in painting or stained glass painting and I was making a little pocket money, too. 

            Then, my daughters were born, one after another, and I decided to concentrate on them for a few years.  During this time, my husband was transferred to London, and we took our two little girls to London, and this kept me quite busy for some time.  However, after about a year or two, when I couldn’t handle singing nursery rhymes while in the shower, I decided to go back to some form of art work.  I did a few courses in clay modelling and silk painting at a local college, and then I found a weekend course in stained glass.  My husband looked after the girls for that weekend while I went for this course, and I came back all fired up to start.  I bought all the materials I needed and started working using my dining table as my work table.  Because my girls were so small, I had to be very careful that there was no glass on the carpet, and I became very good at cutting.  I made some small projects to begin with, then moved onto a tiffany lampshade and some other 3-dimensional projects.  I actually even got an order which turned out very well – a window – the largest project that I had made so far.  It was quite difficult for me at the time.  The stained glass shop was a bit far, and we didn’t have a car in London.  So, I would drop my older daughter to school, and take my younger daughter by bus to the stained glass shop and buy my materials.  I would hang them on her stroller, as it was quite heavy to carry.  Then I would come home and start working.  I had a hand held stone grinder which I had to wet with water and used for grinding my glass.  We couldn’t afford an electric grinder at the time, and I made my tiffany lampshade with a hand grinder!  But I was so fired up, that I walked through all the difficulties that came my way!

            A few years down the line and we were transferred to Antwerp, Belgium.  I found a stained glass shop fairly nearby and by then we had a car and I was driving!  Whew!  What a relief!  I also found a fantastic art store very close to my house and plenty of parking.  Both my girls were all day in school, and for the first time I had the day to myself and I could get around easily.  By this time, I was painting in oils and sending them to Bombay to an art gallery where my paintings were getting sold almost immediately.  Antwerp opened a lot for me creatively – I was able to get materials for anything that I wanted to do.  I made a good friend who was also interested in creating and together we dabbled in all sorts of arts and crafts, although my painting and stained glass was my own.  Then, one day, my friend and I saw a table made in mosaic at the stained glass store.  We asked how it was made and the owners were very helpful.  By this time, I had a very good relationship with them, and had also done some courses of stained glass with lead instead of copper foil, and sand blasting….. and I was going there all the time.  They showed us a glass cutter similar to the Leponitt ones and we were in seventh heaven… we had the means to use up the glass wastage that I had from stained glass and make some new products.  I taught my friend how to cut glass and we made a table each and then another, and I was invited to demonstrate my mosaic at a stained glass exhibition.  There I met the Leponitt cutter manufacturers.  They were demonstrating at the next table, and they introduced me to the Leponitt cutters and different ways to cut glass with these cutters…..

            Then we were transferred back to Bombay – and I had to start all over again! 

            Initially, it was difficult to find opaque glass that I could use in Bombay, so I decided to use china and tiles.  But, somehow I wasn’t too motivated by this medium.  Then I found some glass – very limited colours, but, all of a sudden I had a number of a person who could supply me with spectrum glass.  He would come home with his sample box, and I would choose my colours, and then he would deliver this to me at home.  It was fantastic!  I just had to buy a minimum of 4 square feet in each colour, so this made it quite expensive, but at least I could do some work and I wasn’t stuck!  I was painting madly, too, and had started watercolours.  I would go all over Bombay with my paints and paper in hand, and paint in plein air.  It was great fun.  I put these paintings together in a book called “BOMBAY!”  At the same time, I had started selling in a couple of stores and I was getting good orders.  I went to an exhibition at the The Happy Home & School for the Blind, and saw that they were doing glass mosaic, but with already cut up glass supplied by another stained glass artist.  They didn’t have the tools or the know-how to cut their own glass.  Mind you, these boys were partially blind and not fully blind.  So, I volunteered my services there, and provided them with the Leponitt cutters to start with.  They also learned to score and cut glass and soon there was a mosaic studio at the school, and we were producing a fair amount of mosaic.  We did some huge projects there, including a huge wall and two floors.  We even did a series of Four Seasons – 3’ x 3’ panels each depicting a season.  The school bought their own glass and invested in grinding and cutting machines.  Some of the boys I taught have graduated from the school and are now working there in the Mosaic Studio, and this is their livelihood.  I also came across another NGO called “Saathi” that looked after teenage boys and girls that had run away from home and come to Bombay.  The mosaics that they did were incredible, too.

            Around this time, I started my journey on a Spiritual Path with an Australian Guru, and I was juggling many activities at once. I had had several art shows with my paintings, but then my father fell very ill with a terminal illness, and I stopped all mosaic orders, because I knew I wouldn’t have the time to fulfill them.  I took a break from mosaic for over a year – I couldn’t get back my earlier orders and the shops that I was supplying to had closed down or had moved on.  It seemed as if the door had shut on me for mosaic.  Even if I started again, I wanted to do something that was more challenging than what I had done before.  I became very involved in my Spiritual path, and my paintings.  I had also moved house twice in this period and was a bit unsettled where mosaic was concerned.

            One day, I decided that I was not going to depend on any store buying my stuff, and I was just going to start again.  I racked my brains for something that would challenge me and decided to make some carpets in mosaic.  I had made a large one earlier 6’ x 3’, and it had taken me about 10-12 days to make it, but this time I felt to make some smaller ones.  I had friends who had birthdays coming up, and so I started again.  The carpets have been a real joy to make and have!

            I have made small and large projects in mosaics – from trays to chairs, tables, mirrors, lampbases, vases, carpets.  I have searched chor bazaar and hunted for different types of furniture to mosaic on.  Earlier, I used to do a lot of floral designs, but lately I seem to prefer more geometrical designs.  I work quite fast and once I get started on a piece, I work for several hours in a day, because I enjoy it so much, although now my back kills me!

            I have a small space in my home where I cut my glass and work.  All the glass is in two cupboards with the spare pieces in different jars.

            Although I have worked mostly on wood, I would love to work on bathroom sinks – this is a challenge for me, as I don’t know what are the materials needed in these projects, in terms of glue and grout.  The greatest challenge in India of mosaic-making is the procuring of the materials needed in smaller quantities and another challenge that I personally face is the space required to do bigger projects.  It is so expensive in Bombay to hire studio space and so I work from home, which has its limitations.

            Mosaic-making definitely is very therapeutic.  This was proven while working with the girls from Saathi.  They used to open up with their problems while doing the mosaic.

            I wish we could get more materials readily available in India, and in smaller quantities, otherwise mosaic is a very expensive hobby and this can put people off.

            My advice to a new mosaic learner based in India is “Where there is a will, there is a way”!  Just persevere and you will find the all you need!

            The Facebook group Mosaic India is a very good start – it definitely shows people how to start their own mosaics, and the website is very informative.  I feel there could be some videos and demonstrations and tutorials that people can take part in online, and that might be helpful.  Also I wish we could sell the materials needed from the website, too, so that it’s easier for people to start if they want to.  So, the materials required and some helpful videos and how to books would be greatly helpful to beginners.  Maybe a Mosaic Artists magazine giving names of suppliers, etc. based in India.

            Today, with Pinterest and Facebook, there is a lot of inspiration available on the internet.  I used to buy books because none of this was available when I started.

            I have not put my projects on the internet until recently.  Its just that with all that I was doing, I just didn’t have the time.  My children and friends have been after me to at least get on to Facebook, and so after much pushing and prodding, I joined Facebook.  Some of my recent paintings and mosaic can be found on Shilpa Dalal Studio. I have yet to add more of my earlier works and paintings, too.

            I hope to do more challenging work over the next five years – although I don’t know what that is as yet.

            You can reach me either via email:  shilpadalal2@gmail.com or my phone number:  098210 22559

            WHERE THERE IS A WILL, THERE IS A WAY!  That’s my philosophy!

Mosaic Supply Store: Cefino, New Delhi 

Background

I’m pleased to share the lead to another India based glass tile supplier through this post. Two members from the Mosaic India group happened to learn about the supply store Cefino and bought small stocks of vitreous glass tiles from them. My calls to the company’s sales executive got me this information on their materials:

. Cefino imports vitreous glass tiles from China in size 20×20 mm, and manufactures ceramic tiles in size 1×1” in its factory located in Noida.

. The company sells tiles to retailers as also makes mosaics using whole tiles with the help of proprietary design software.

. It gets the imported tiles pre-stuck on sheets in single colours that it uses to create newer sheets with randomly mixed tiles or popular colour combinations for retail sales. As mosaicists, I mentioned, that we’ll be interested mostly in single colour sheets.

Cefino‘s manufacturing unit is in Noida, tile stocks are kept in Neb Sarai near IGNOU in New Delhi, and a small office is located in Malviya Nagar, New Delhi. The stocks can be seen only in Neb Sarai but at some notice the requested tiles can be sent over for the purchaser to the office in Malviya Nagar.

Range of Tilesimg_4189

. The following varieties of glass tiles are available in size 20×20 mm:

Classic: Rs100/sqft (grainy)
Gold line/Iridium/Crystal: Rs300/sqft
Marbella/600 series tiles: Rs720/sqftimg_4191

. Presently, the Classic range includes only the grainy variety of vitreous glass tiles.

. These prices are MRP as of October 2016 and may go through changes. img_4192To the extent possible, Cefino will offer some discount on their MRP figures.

Method of Purchase 

. Those located in NCR can request tiles from the company’s Sales Executive through Whatsapp by quoting the tile codes and quantities. They should include their address and mobile number in the message and fix up the specifics on stocks and delivery time through a phone call. When in stock, tiles can be made available at Malviya Nagar in 2 days after a prior request. One can go pick them up.img_4188

. Those in NCR have the choice of requesting the door delivery of tiles as long as the delivery person’s commute charges are reimbursed by the purchaser. When available, tiles will be sent over within 3 days to most locations in NCR.

. Cefino can sell a minimum of 1 sqft per colour of tiles.

. Outstation deliveries of tiles are also possible if the courier charges are paid in advance. Further details can be taken from the company.

Contact Information

Mr. Marutesh Singh
Sales Executive
Cefino
B-101 Rear Basement, Malviya Nagar
New Delhi  110017
Website: http://www.cefino.in
Phone: +91-11-41831004
Mobile: +91-9818636657

With this supplier, mosaic-makers based in India can order vitreous glass tiles in small quantities from 2 different sources. If you know of any more, do let me know.

Mosaic Supply Store: Sai Mosaic Art 

Background 

The need to source tools and tiles for mosaics has meant much web-trawling for me and on one such scan of Amazon India, I’d found small kits and stocks of crystal glass tiles being sold by Ahmedabad based Sai Mosaic Art. I found their website, emailed them to ask about their products, and if they would make them available to small scale mosaic-makers like me. I kept learning more about their products bit by bit. Not only that, a few weeks later, the company owner Mr. Patel spent a morning in Gurgaon while on the way to UP and met me and a few more mosaic-makers.

Mr. Patel made notes of our needs and approach to creating mosaics, said that he’d be keen to help small artists scattered around the country, and later shared with us a list of products, their pricing and minimum quantities that his company would supply. Apart from the adhesive, I’ve now used all their products listed below and can confirm that they indeed fulfil many requirements. Other than a wide range of glass and ceramic tile shades, their mesh is of good quality and works as intended. I’d bought a few small mesh pieces from Amazon US and paid much more than the rate offered by Sai. At least 2 of the 4 picks they sell are invaluable and at the price they come, those of you conducting workshops can easily keep 4-5 sets.

Sai Mosaic Art’s current product range:
(with the minimum permissible order per item)

  1. Crystal glass tiles in 15×15 mm size and 3 mm thickness – 1 sqft or approx 400 tiles
  2. Ceramic tiles in varying sizes in 5 mm thickness –  500 gms in size 1×1” with approx 80 pieces to fill 9×9” space img_3478
    . 12 pieces in size 4×4”
    . 4 pieces in size 6×6”
    . 2 pieces in size 12×8”
  3. Mosaic mesh by meter – 1×1 meter
  4. A set of 4 mosaic picks – 1 set
  5. Adhesive—white glue for indoor mosaics
  6. 3-board shade kit in ceramic tiles
  7. 8-board shade kit in crystal glass

Method of Buying  img_4001

. Email the tile codes with quantities to Sai Mosaic Art.
. Include your complete address and contact numbers in your email.
. Await confirmation via email on stock availability, time to be taken to despatch the items and the final amount to be paid.
. Transfer the amount to the seller’s bank account.
. Await the courier.

Where stocks are available, it takes upto 7 days to have the material in hand.

Contact Information  img_4003

Sai Distributors Pvt Ltd
A/7, SF, Millennium Plaza, Mansi Circle
Vastrapur. Ahmedabad 380 015
Gujarat, India
Ph:- +91 79 40009386
Fax:- +91 79 26764962 img_4004
Cell:- +91 98 25073678
http://saimosaicart.com/
EMAIL: saidistributors7@gmail.com

Further Tips from Me 

Crystal tiles: When you see the beautiful crystal shades on their website, you’d be tempted to acquire small stocks of all the colours for they look like jewels and cut easily with wheeled nippers due to their 3 mm thickness. They look smaller than 15x15mm because of their rounded corners so many mosaicists would be happiest using them without cutting. In fact the shiny SPR tiles must be used whole because of the gold foil used at the back but the rest of the marble or luminescent tiles cut well. My tip is to buy one sqft in each of the 5-6 colours that you’re absolutely sure of using and buy a set of shade boards at the same time. When seen up-close, the iridescence or luminescence of tiles is much clearer than their images make them appear so it helps to have the boards on hand to decide on colours. Place the rest of your tile order on getting hold of the shade kit.img_4006

Ceramic tiles: the smallest size available is 1×1” and they arrive in a perfect state in the courier. Bigger sizes tend to see some breakage but the company is good about replacing any broken tiles so don’t lose heart.

Mesh: The quality is good and even though it arrives folded, it straightens without much effort. img_3329

Picks: They are a must-have in every mosaicist’s kit.

Click on the images to see their bigger size.

Make a Mosaic 

The purpose of this post is to list out the steps involved in making a mosaic so a complete beginner can make it.

Materials Needed* :

. Substrate: A small 4-8 mm thick mdf board piece
. Vitreous Glass Tiles
. Wheeled Cutter/Nipper
. Fevicol SH
. Fiber-tipped pen
. Plastic dish and knife
. Grout
. Admixture
. Sponge

Step 1: Prime the mdf board 

To increase the adhering quality of any substrate, it is either scratched and primed or just primed. Priming of any IMG_3954wooden/mdf board is usually done with diluted fevicol. Take a small blob of fevicol and double the amount of water, mix them up, and brush the watery glue onto the side of your substrate that will be mosaicked. Let the surface dry completely over some hours before using it.

Step 2: Draw or trace an image 

Trace an image on the board using carbon paper or simply draw it with a pencil.

Step 3: Cut the tiles/tesserae  

Decide the colours and cuts of your tesserae. Take out the required quantity of tiles in a sectioned tray. Cut them in the IMG_3959shapes and sizes you wish to see in your mosaic. Little bit of nipping will be necessary with some pieces to fit them in odd places but it helps to keep the tiles cut before they are stuck. If you haven’t decided on the shapes of cuts…as it’s usually the case with me…cut tiles at least for the main element. The easiest cuts are halving the square tiles and then halving the halves to create small squares. You can create triangles by cutting the square tiles diagonally.

Step 4: Dry-lay the tesserae and decide the andamento 

I prefer to dry-lay the cut tiles into the main element of my IMG_3963mosaic so I can get an idea of their effect and I don’t have to remove them once they are stuck. Use a fiber-tipped pen to draw the exact shape or size of a tile’s piece that would fit in an odd spot and cut the tile along the drawn line. In the mosaic in the image, the background beige tiles are dry-laid to decide the flow that looks the best. I’ll stick them once I like the flow. The main elements and the border are stuck already.

Main Tip: Be mindful of the arrangement or flow of your tiles for a neat and planned andamento. A mosaic’s andamento lends it its main personality and character. As a mosaicist progresses on the path of mosaic-making, her compositions would reflect well-thought out opuses and not just a bunch of tesserae placed next to each other. This is what sets apart a mosaicist’s approach to laying tesserae over that of a mason. For your first piece though, you may just follow your instincts for tile cuts and placement to figure the basic technique of making a mosaic.

More Tips: I take breaks in between stages of arranging the cut tiles and their sticking so I can view the composition with a fresh eye on every visit to the work-table. I also like to click the mosaic in between so I can mull the colours or cuts on the phone’s screen while I’m away from the mosaic.

Step 5: Stick the tiles 

Take out only small amounts of fevicol in a shallow dish so it finishes before drying up. Some artists like to use a spoon to take out the glue and place it upside-down on a flat dish to access the glue easily.

If you’re like me, you’d cut your tesserae/tiles small and find it easiest to pick them up only with pointed tweezers. Either way, use fingers or tweezers to pick up each tessera, place it ever so gently on the glue without losing hold of it, and then place it in its intended place on the substrate.

Tips: . Keep a paper tissue handy to wipe glue off your fingers and to clean the tips of the tweezers. Take just some glue on each tessera, and not an excessive amount, as extra glue will spread out of the tile’s surface and fill the gaps meant for the grout.
. I recycle ice-cream sticks, plastic knives, yogurt containers and all sorts of objects that keep appearing before me in life for various stages of making my mosaics so I suggest you start saving such items.

Step 6: Grout the mosaic  

Grouting is done at least 24 hours after the mosaic has completed. It’s best done for the first time with someone familiar with it but the process itself is simple. Sanded grout is the commonly accepted grout as opposed to the un-sanded variation.

For a small mosaic, about 1 tablespoon of grout should be mixed with enough admixture (a capful to begin with) to form the consistency of thick porridge or peanut butter. Once mixed, it’s allowed a few minutes of slaking time and then applied with a rubber spatula on the mosaic. Attempts have to be made to gently push the grout down the grout lines created by the tesserae. Once the grout is smoothened over the surface of the mosaic, it’s allowed to rest for 5-10 minutes. After that a piece of wet sponge that has had all its water thoroughly squeezed out is used to clean the grout off the tiles. Care is to be taken to keep the sponge without any water to avoid soaking the grout with water. The sponge is turned about constantly to use all its clean sides and then washed in a mug of water to re-emerge cleaner and without extra water in it, and used again. Once the tiles are somewhat clean, the grout is allowed to dry over 30 or so minutes. After that a toothpick or metal pick is used to clean the left-over grout from the surface of tiles. As the grout dries some more, dry soft cloth is used to clean and polish the tiles so they lose any remaining film of grout from their surface.

Your mosaic is then ready to sit flat to dry fully and go for framing the next day.

Notes on the Materials:

. I find it easiest to source small sized 4 mm mdf boards from a local framer. For different shapes, I use Craftslane.
. Small quantities of vitreous glass tiles can be bought from Minimason and Sai Mosaic Art. Big quantities can be bought from local tile stores or Sai Mosaic Art.
. The easiest source of Wheeled cutters is still Amazon US. This Goldblatt cutter is heavier than a Leponitt cutter but it gets shipped to India, works well and stays good for a long time.
Slightly more expensive Wheeled Nippers meant for Porcelain tiles may be available from NBHT in Mumbai. Calling and talking to their Sales Head would tell you of their availability. My 3-part posts on tools carry leads to more tools.
. Grout and Admixture of brands Ferrous or MYKLaticrete are considered of good quality.

Glossary: 

. Substrate – Any kind of base used to mosaic on
. Tesserae – Any materials/tiles/beads used to stick to substrate
. Andamento – The flow and direction of tesserae
. Opus – Many kinds of specific tile cutting and laying styles that form a mosaic’s andamento. Some of these are Opus Musivum, Tessellatum, Circumactum, Vermiculatum etc.


How to Start Making Mosaics

Note: This post is concurrently published at http://www.jyotibhargava.com

My previous posts attempt to share leads to tools, tiles and adhesives used in mosaic-making but an interested learner may still be flummoxed in the face of choices and may still wonder how to go about making a mosaic. My view is to follow the approach below.

Join a Mosaic Workshop Makingmosaics

If one can find a trainer, making even a small mosaic under guidance
demystifies the process of holding the nippers, cutting tiles, arranging their flow, sticking them and then coming to grips with the messy but all important grouting process. One may have How-to Project books, good Net bandwidth to watch video tutorials but there is really nothing as ideal as learning by doing it under guidance.

Since the last year that I’ve been running the Facebook group Mosaic India, I’ve learned of a few India based mosaic-makers who train as well. If you wish to connect with a trainer, join the FB group and enquire about trainers in  your city.

Learn to cut Stained Glass 

India has more Stained Glass practitioners than mosaicists. It may be, therefore, easier to track down a stained glass artist than a mosaic-maker. Reach out to artists in your city, request that they teach you to cut stained glass shapes. Traditional stained glass requires steps of grinding shape edges once they are cut, copper-foiling them and then soldering multiple shapes to create a composition or 3D piece. To make mosaics, a learner can get oriented on scoring and cutting shapes of stained glass, and then move on to the steps of sticking shapes and grouting the composition.

Buy a Mosaic Kit and Make it 

A small mosaic kit comes with materials and instructions on making a mosaic. The kit doesn’t carry any nippers but it does have pre-cut tiles and other essential items. Making a mosaic using a kit demystifies the basic steps involved in creating a finished mosaic and that can get many learners going onto more. In India, I’ve heard of only 2 sources of basic kits but on Amazon US I can see 8-10 kit options. They don’t ship to India but any friend from the US may be asked to bring you one.

Offer to be a Mosaic-maker’s Assistant 

Even those mosaic-makers who do not run workshops or teach in one-on-one sessions, may value help to finish their commissioned pieces. Be on the lookout for such opportunities to learn as you assist.

Just Make It 

If you have none of the above options available to you, just make a mosaic based on your understanding from How-to books or videos and get going. Ask questions, share your experience of making your first mosaic in the FB group and keep taking leaps beyond.

In the next post, I’ll describe the exact process of making a simple mosaic to help remove any further hesitation that a beginner feels.

Adhesives Used in Mosaics

Note: This post was first published on May 17, 2016 at http://www.jyotibhargava.com 


Since mosaics can be made with varying media and substrates, a careful thought on adhesives becomes necessary. Some quick considerations that come to mind are these:

. The intended location of the mosaic – outdoors or indoors
. Weight of tesserae – ceramic tiles, glass, shells or stones
. Size of mosaic – a large wall, a 3D installation or just a small coaster
. Climate conditions – overly humid or frost-ridden or dry
. Substrate material – cement, glass, stone, wood or metal

Here are the adhesive choices that I’m familiar with:

PVA

Fevicol is the most popular PVA used in India. The craft quality fevicol is IMG_3504graded as MR and it’s good enough for small wall art, but as the size of substrate and weight of tesserae go up, it’s prudent to use the carpenter quality PVA or Fevicol SH. Of late, I’ve seen Fevicol Marine being sold as a more waterproof variant but I still need to test it for outdoors.

Fevicol dries clear and it’s good for mdf, wood and fibre mesh.

Silicone

Internationally, silicone is recommended for mosaics meant for outdoors. My own experience shows me that the silicone we get here in different brands has less adhesion than Fevicol SH. I’ll keep checking more brands of silicone and post an update on the brand that works better than Fevicol SH.

For Glass on Glass, artists recommend thinly and evenly applied silicone as it dries clear. Those of you with experience with silicone should please share the silicone brands you’ve found effective.

Thinset

If not Silicone, the adhesive highly recommended for outdoors is Thinset. It’s essentially grey or white cement with chemicals for better bonding. Thinset is mixed with water, allowed a few minutes of slaking time and buttered on the reverse of tiles to stick to substrates like wood, metal, stones or walls. If a mosaic is created on fibre mesh, the mosaicked mesh can be applied to its intended substrate using Thinset. White or grey colour can be chosen based on the colour of tiles and substrate.

Popular brands of Thinset used by folks I’ve connected with are Laticrete, Asian Paints, Ardex Endura and Roff.

Epoxy Adhesives

Epoxy adhesives come in the combination of Resin and Hardener as in the popular brand Araldite. Once mixed, the adhesive has to be applied quickly as it hardens within minutes. Epoxy adhesives are waterproof and bond strongly but because they don’t dry clear and they give little time for applying to tiles, they aren’t favoured by many.

Pre-mixed Adhesive Pastes

I’ve known of white pastes from Kerakoll and Roff that are recommended for adhering fibre mesh or direct tiles to walls but because they come in large buckets, I haven’t acquired them for testing as yet. Those of you with experience with these adhesives are requested to share your views on the brands you’ve found effective.

Superglue/Quikfix

I use these adhesives for those odd tesserae that weren’t stuck properly and come off the substrate as I start grouting the mosaic. Their instant adhesive and drying qualities are helpful in those situations.

I’m sure I’ve missed many glues from the list above. In international groups, I keep hearing of liquid nails or elmer’s glue and the hugely popular Weldbond, none of  which I’ve had access to. So do tell if I should include any more adhesives in my mosaic kit.

Mosaic-making: Substrate Choices

Note: This post was first published on April 27, 2016 at http://www.jyotibhargava.com 


After covering leads to tools and media for creating mosaics I’d like to share ideas on materials that can be mosaicked. The base that one uses to create a mosaic is called a Substrate. This base can be flat to hang on a wall or a 3D object to place indoors, outdoors or can be a wall itself. Every material and its intended location would need consideration on the adhesive suitable for it; a topic I’ll cover in another post.

Here are some ideas on what you could be using as a base for your mosaic:

MDF

Medium-density Fibreboard or MDF is easier to cut, and weighs less, than commercial ply and it can be easily bought in the required sizes from local framers or wood suppliers. The thickness recommended for mosaics IMG_3340is generally 8 mm to carry the weight of tesserae but framers provide 4 mm ones that they themselves use for supporting frames, and those have served me well enough for sizes under 11″x14″. I get them in small or medium sizes from a local framer very cheaply and keep them handy for vitreous or stained glass mosaics.

There are shops and online craft stores that can provide mdf shapes in varying shapes that expand the range of mosaicked products one can create. These can be coasters, trivets, trays, shaped photo frames, boxes and more. The online sources that I know for mdf shapes are these:

Craftslane
Itsy Bitsy
Hobby Ideas

Since mosaic-making is still a lesser-known art, mdf shapes are made available by suppliers essentially for Decoupage. However, any 4+ mm mdf cutout providing large enough area for glass pieces to adhere can be used for mosaics.

Ply/Commercial Board/Wood

For heavy ceramic tile or crockery cuts, or large sized mosaic compositions for indoors, it’s best to use a commercial board or a thick ply to prevent its sagging under the tesserae and grout weight. Get it cut in the required size from the place of purchase.

Wooden bowls, driftwood or stumps of trees are all good for mosaicking too.

Cement Paving Tiles and Other Objects

Pre-made cement stepping stones are favourite substrates among many for gardens or pathways. Cement flower or plant pots, bird-baths, fountains, garden benches or tables can also be mosaicked, and they look wonderful with a colourful play of ceramic or glass tiles.

Terracotta Objects

Planters, bird-baths, fruit-plates can work as substrate choices.

River Stones and Boulders

If these stones offer flat patches then they can be mosaicked and placed outdoors or small river stones can be used as paperweights for indoors.

Walls

Walls can be mosaicked using a direct method onsite or double-direct method that uses a fibre-mesh offsite for eventual adhering to a wall indoors or outdoors.

Glass

Glass on glass (GOG) is a favourite method or subject of mosaicking for many. Window panes or sun-catchers can be created with stained glass so light reflects through them. Glass lamps or bottles get covered in this category too.

Plexi-glass or Polycarbonate Sheets

These can be cut with a mechanical tool or special scissors to create garden-stakes or other garden art as this base works like glass for sunlight to filter through.

Metal

Iron metal tables or garden stakes are popular substrate choices among mosaic artists for creating objects for outdoors, and they look rather charming because of the stark difference between the black metal and colorful tiles.

Besides above, I’ve come across mannequins, dense foam, plaster of paris sculptures, slate tiles, the reverse of ceramic tiles etc. being used by many artists as substrates for their mosaics. Another favorite substrate for vertical art meant for outdoors is Wediboard. This board is made of foam, covered on both sides with a thin layer of cement and it’s waterproof. It’s also light-weight and cuts with a sharp kitchen knife so mosaic artists internationally prefer its use for outdoors or shower areas. I’m still to find a similar product in India but for now, given the wide substrate choices listed above, I already have a long list of substrates and tesserae to experiment with to further my skills as a mosaicist. And, so do you 🙂