Interview with Archita Sanganal

We are happy to introduce another India based mosaicist to inspire our readers. Do leave your comments or questions.

Archita, do tell us a bit about yourself.

Since childhood, I was very keen on art. My parents always knew that I’ll be choosing art as my career, and they always supported me. Unfortunately, we had very less knowledge and information about art courses as there was no internet and very few around me were into arts.

In the year 2002, when I was about 14 years old, I met Mr Madhusudhan Chitnis. He was a retired schoolteacher. He transformed my art to another level, and I still follow the basics he taught me. I did commercial arts (Bachelor of Fine arts) from D.Y. Patil, Pune college in 2010 and I started working as a graphic designer but working on a computer was not my cup of tea.

Later I got married in 2012 and thereafter years passed with all household chores and raising my daughter. When we were in the USA, I used to watch Caroline Jariwala’s YouTube channel and was obsessed with her art of mosaicking, as I always liked making bigger art with small pieces like we did collages with paper pieces in school. Then I decided to give it a try.

I got all my tools from the USA, we moved back to India and I did a lot of experiments with mosaics. I failed abruptly initially but kept on trying.

People around me, who had absolutely no clue what I was up to, ended up thinking I was crazy. I didn’t have much space for the material I had ordered, tiles were all around my house. Eventually, I managed to complete a few projects for my own house.

I started mosaicking professionally in 2020. People started observing and appreciating my work. I made many outdoor mosaics in two years, which couldn’t be possible without my dear husband’s installation skills! Today, I have my own mini studio with huge artworks popping up and I feel like a boss when I cut glass!!

How did you start making mosaics and how long ago was that? 

I made my first mosaic in Feb 2018, it was 2×4 ft for a wall. I made a scenery, a very basic one, it had sunrise with calming water and some greenery, I call it Sunshine. My Mom and I somehow managed to install it on a wall of our balcony. Pretty huge for a first-timer but I don’t know what stroked my mind and made me get 5 to 6 boxes of tiles, a roll of mesh, adhesive, and grouts, basically a very big start to begin with. No, it wasn’t easy at all, I was messed up and knew no one who could guide me. Still, I was sure that I wanted to make mosaics and after all “Rome was not built in a day!”

What are your preferred mosaic materials?

I work with stained glass, vitreous tiles and ceramic tiles. I also like to use broken jewellery and glass beads. Every material has its own beauty.

Do tell us about the kind of mosaics you have made and those you plan to make in the future.

I have done many outdoor mosaics on walls, most of them were nameplates. I have recently made a tropical mosaic mural with stained glass which is around 80 sqft wide. I’m planning to make more intricate mosaic murals of Indian Gods and Goddesses.

Where do you find inspiration for your compositions?

I find inspiration from nature, Indian art, and the people around me.

What is the typical size of your mosaics? How long does it take you on average to complete a mosaic? How many hours of a day do you work on an ongoing project?

I have made coasters of 4X4 inches and also a wall mural on a 17×5 ft wall. The typical size of a nameplate is around 15×20 inches, and it takes me around 5-6 days. I used to work for almost 6 hours but now I hardly work for 2 hours a day as I have 8 months old baby to raise.

What challenges have you encountered in mosaic-making?

Lack of knowledge was the biggest challenge initially but at later stages, I came across artists who guided me. Kanika Singh from Mini Mason was the first one I spoke to, and she guided me selflessly. Also would like to mention Renu Sharma from Delhi and Anand Kale from Pune, for answering my fatuous questions.

What do you like about Mosaic-making as an art?

Everything 🙂

It’s an amazing art, versatile, most durable with easy maintenance.

What is your Wishlist for mosaics as art in India?

I wish mosaics to be a part of the curriculum in all art colleges in India. Students must have a basic idea about this art.

What is your advice to a new mosaic learner who is based in India?

It’s too early to give advice as I’m still learning but the things I realised during the process are….

  • Start slow, start small but the key is perseverance
  • Must Attend mosaic workshops

Are there any learning resources or mosaic artists you would like to point new learners to?

  • Caroline Jariwala’s Mango Mosaics (Youtube Channel) is very useful.
  • DIY kits can be of great help for beginners. One can source it from many mosaic artists on Facebook and Instagram.

Any mosaic or art-based philosophy that you’d like to be known by?

Work hard to create great things!

Do share with us some of your creations and links to your website/gallery.

https://www.instagram.com/pieces_mosaichub/

https://www.facebook.com/Pieces.mosaicpune/

The best of my work is yet to come!

Archita Sanganal is a mosaicist based in Pune, Maharashtra, India. She takes commission requests for functional, decorative and architectural mosaics. She can be reached through her Facebook page titled Pieces a Mosaic Hub (https://www.facebook.com/Pieces.mosaicpune/).

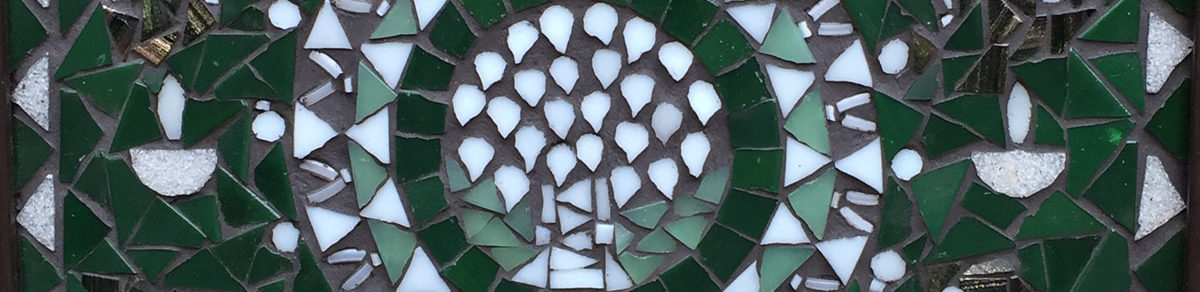
Some Mosaics by Archita Sanganal:

Interview with Sheena Talwar, Painter and Mosaicist

After a long hiatus, we’re thrilled to publish an interview with an India based mosaicist. The interview was carried out by email.

Sheena, please tell us a bit about yourself.

I have been born and brought up in Delhi and did my graduation from Hindu College, Delhi University. I worked with IBM for a decade and post dealing with the board room battles, I took a break to take care of my little munchkins. I have always had a flair for art & creativity, I am a Painter and Madhubani Artist too.

How did you start making mosaics and how long ago was that? 

I discovered my passion for Mosaics around 3 years ago and since then it has been a journey full of learning the delicate art of glass cutting. The experiments with glass cutting became better, granular and more refined with each passing day.

What are your preferred mosaic materials?

I prefer to use vitreous glass mostly. I know ceramics too, but I find it hard to work with it due to dust.

Do tell us a little bit about the kind of mosaics you have made and those you plan to make in the future.

I have worked primarily with vitreous tile and Ceramics. I would want to learn to work with stained glass and Smalti.

Where do you find inspiration for your compositions? What kind of themes interest you?

I find my inspirations in a plethora of things around me ranging from Nature, Wildlife, Indian folk art, Mythology and Abstract art. I have an avid interest in exploring myriad patterns of Indian folk art across the length & breadth of our country; further to this, Egyptian and Roman cultures inspire me a lot.

What is the typical size of your mosaics? How long does it take you on average to complete a mosaic? How many hours of a day do you work on an ongoing project?

My art size varies from artefacts ranging from 4 inches to 5 feet. I put in at least 8 hours’ a day for any ongoing project. Completion time for a project varies depending upon the granularity of work and finer nuances of each project.

What challenges have you encountered in mosaic-making?

It has been a very interesting journey so far and so have been the challenges associated with it. I am penning down a few for people who have just taken or are planning to take a plunge into the beautiful world of Mosaics. To begin with, things as basic as holding the cutter, cutting tiles, procuring the raw material, finding vendors and drawing each project to closure by using multiple grout colours, getting framing done etc.

Learning this art requires a lot of market research for finding suppliers for raw material, evaluating the quality of raw material, multi-tasking with vendors, carpenters, hardware outlets for tools, marketing & branding activities and managing your Social Media page.

Statutory Warning: No Art form comes without an Occupational hazard, anyone aspiring to learn this art should be willing to sustain the pain of multiple cuts in their fingers.

What do you like about Mosaic-making as an art?

I think it’s a unique art, it’s an art which has passed the test of times. Mosaics can be seen across a lot of heritage buildings across the world. The traces of mosaics can be seen in Taj Mahal also which is among the seven wonders of the world.

What is your wishlist for mosaics as art in India?

Mosaics conventionally is seen as an art which is meant for classes, I would wish this art form to percolate to a common man and find its true glory across all the households, in turn making this entire world beautiful.

What is your advice to a new mosaic learner who is based in India?

A new learner needs to be consistent and passionate about this art form, it’s an art which requires a unique combination of skill, physical labour and long working hours. It’s an art form which requires a lot of passion and consistency.

Are there any learning resources or mosaic artists you would like to point new learners to?

I think it’s an art where the learner needs to be very active in doing research around the people creating mosaics around the world and subsequently decide a mentor and begin the wonderful journey. 

Any mosaic or art-based philosophy that you’d like to be known by?

I think hard work, consistency and constant endeavour to learn is the sole mantra for learning mosaics. I feel it’s a gradual learning process. I feel that I am a learner and my best is it yet to come. 

Sheena Talwar is a mosaicist and painter based in Delhi, India. She takes commission requests for functional and decorative mosaics and teaches the art to aspiring learners. She can be reached through her Facebook page https://www.facebook.com/SheenazMosaics

Be Inspired, Don’t Copy 

Original Illustration by Kishore Bhargava

In my 4 years of self-training to be a mosaicist with no hardcore art background, I’ve used many online spaces to observe work, read tutorials and connect with mosaicists. There is widespread concern among many senior mosaicists on their work getting copied without any acknowledgement going to them as the original creators. There have been some who have accepted this phenomenon as a fallout of living and sharing in today’s Net-enabled world but it’s not that they are happy about it. Most others are openly critical of anyone simply treating images shown by Google Search or Pinterest as available to replicate. As a learner and mentor, this is what I advise a new learner to keep it nice and healthy for everyone.

  • Observe Intently. Look at lots of good quality work, observe the cuts  and andamento, and build a reference library of such work to learn from. Keep going back to these images only to observe as that helps internalise some aspects of those works.
  • Draw it out. Instead of tracing anyone’s work, just draw out several versions of those elements in your sketch book. By the 4th or 5th sketch, you will have made substantial changes from the original idea to make it remarkably different.
  • Use Nature, Folk Art, Still Life as your Prime Inspiration. Simply do this. You might claim to be a non-artist but you have admired landscapes, creatures, flowers or artefacts. You have decorated your living space with folk art or worn accessories with such art used on them. Draw out what you have admired and you will find many ideas in your sketchbook for your mosaics.
  • Use Simple Illustrations with your Preferred Fillers. Many mosaicists advise the use of illustrations from children’s books as they are simpler in their form and colours. Use such illustrations to fill them with zentangles, swirls, waves and colours of your choice.
  • Take Photographs. It is easy enough to click photos with smartphones. Take photos of what you see and like, build such a reference library and simplify such photos through your sketches for use in your mosaics. Birds and vegetation make good subject materials this way.
  • Take Help of Photo Editing Tools. You can run filters on your photos in Photoshop and phone apps like Prisma, Painnt and more to create effects and get ideas for your mosaic compositions.
  • Reproduce Roman Mosaics. Small selected elements from ancient Roman mosaics have been copied by many either as they are or by changing their tile cuts and flow. These reproductions become useful studies to understand the cutting and laying of materials, and they are not frowned upon as copies.
  • Be original and Find Your Style. As you make more, you will know more. With every 4-5 mosaics, you would know your preference for materials, colours, cuts, design elements, etc and your future work will show a certain preferred style of your own.
  • Get Feedback on your work. Get honest and brutal feedback on your mosaics from other creators, your family, a visiting friend, mentoring groups and reflect on those reactions. Don’t feel bad about it for you’re learning to be a good creator and any feedback teaches you some things that you hadn’t noticed.
  • Copy to Learn but No Sharing or Selling that Output. If you must copy to further your understanding of anyone’s technique, keep that output as your study without sharing its image on social media or ever selling that mosaic even as an ‘inspired’ piece of work. Those learning to paint may be displaying such work in galleries but it is just not right.
  • Create Regularly, Save its Photo and Gift it Away. Merely observing and admiring others creative output would not teach you to be a good mosaicist. You must cut the materials and create compositions to take your lessons. Make lots of small mosaics, take their photos for your personal library and gift them all away so you can create space for more to display in your home.
  • Create Mosaics for Enjoyment. After making 15-20 mosaics, you may start getting commissioned to duplicate your earlier work. Take those orders by all means but don’t create only to sell. Create for the sheer pleasure of it so you can enjoy the journey of learning too.


Mosaic-making Tools

I’ve written multiple posts on sources of tools for India based mosaicists, but since they date back to 2 years, I’m presenting an update on the most essential tools that I find necessary for mosaic practitioners. The recommended tools are listed under the materials they can handle.

GLASS TILES AND CHINA

 Wheeled Nippers 

Sai Mosaic Art : As of now, Ahmedabad based Sai Mosaic Art is the only e-commerce enabled website in India that sells tools and tiles for mosaic-making. I recommend their wheeled nippers because they are fast to buy, they are well-priced and they work well enough. The site also sells replacement blades for these nippers. Approx. Price: Rs1400.00

NBHTPL : Mumbai Based New Bombay Hardware Traders Pvt. Ltd. sells these heavy duty nippers by RUBI (Rubi 83942) that cut glass or ceramic tiles or china with equal ease. They are more expensive than most brands of wheeled nippers but their advantages are their multi-material use, quality and availability. Approx. Price: Rs3700.00

Leponitt Nippers  from Amazon US : Although these nippers are not available in India, the reason for including them in the list is to highlight them as an ideal tool to own. Those with a choice to ship items from Amazon US to friends in the US and get them through their visits, must exercise the choice and acquire a pair. These are lighter in weight than most nippers I’ve used and have good quality blades. Approx. Price: $29.00

STAINED GLASS

Scorers

Toyo Thomas Grip Scorer from Amazon US : This scorer isn’t available in India but it’s considered as the best cutter for stained glass sheets. It can be sourced from Amazon US if one can find a helpful acquaintance travelling from the US. Approx. Price: $27.00

Toyo Pencil Scorers : I had found this scorer in a local hardware store on a visit but not on my next one. It’s worth checking with local stores on its availability. Other local brands do not have good quality blades even if they look like these. Approx. Price: Rs250.00

Stanley Glass Cutter : It works as well or even better than locally made pencil scorers. If one can’t source a Toyo scorer then this cutter is worth acquiring. Like with other glass scorers, it should be run onto a cotton swab dipped in kerosene or machine oil to lubricate its wheel before using on glass. Approx. Price: Rs140.00

Running Pliers

Studio Pro Running Pliers from Amazon US : To break a score on a stained-glass sheet, one needs a pair of Running Pliers. I use Studio Pro’s Running Pliers that I sourced from Amazon US. These may be available in Indian hardware stores under a different brand name but I haven’t seen them locally. If you do find such pliers locally, remember to buy only those that have a raised bump on the lower jaw to help break a score. Approx. Price: $11.00

CERAMIC TILES AND POTTERY

Scorer cum Snapper from NBHTPL : This tool by RUBI is a well-made and well-priced scorer-cum-snapper for ceramic tiles. They call it a Tile Cutter. It can be purchased from NBHTPL in Mumbai by sending an email to their Sales Head, Mr. Akshay Jain (akshayjain at nbhtpl dot com). Approx. Price: Rs700

Rubi Compound Nippers : These nippers from NBHTPL (Rubi 65926) are a good choice for shaping ceramic tiles. Their jaw has straight blades that aid breaking of ceramic tiles from the tile’s edge. Approx. Price: Rs1400.00

Sai Mosaic’s Professional Nippers : These nippers could become one’s second pair for shaping ceramic tiles. Their jaw has rounded blades that help with circular nipping. Approx. Price: Rs1000.00

MD Buildings Compound Nippers from Amazon US : These are my favourite compound nippers. I bought them from Amazon US at half the price mentioned against them at Amazon India. Amazon US still ships them to India so one should check if it makes sense to buy them from the US through a friend or on direct shipping to India. Approx. Price: $12.00


My Dremel Experience 

I’d long wanted to acquire a Dremel rotary tool to manage some tasks as a mosaicist. At some point, Amazon India’s discount sale brought the tool’s price down by a couple of thousand rupees, making it seem like an opportune time to buy it. If anyone else is considering its purchase, the information below may help one reach a decision.

The Right Model 

My enquiries in international mosaic groups had highlighted Dremel 4000 as the most apt model for my purpose as it had the power to allow long duration use as also enable varied cutting tasks. The price of Dremel 3000 was always more attractive but I tried my best to not succumb to the temptation to buy it. Too many people had mentioned that the model 3000 had blown up on overuse.

The model that I finally got from Amazon India is this one:

Dremel 4000-4/65 EZ 175-watt Multi-Tool Set (69-Pieces)

(An introductory video: https://www.youtube.com/watch?v=meyhj6QpedE)
4000 is the Model number; 4 denotes the number of attachments that come with the tool; 65 is indicative of the small accessories bundled in.

Upon checking on Amazon India now, I see that this model is no longer available. It’s possible that Amazon managed to sell its complete stock at that sale. One of the reviewers on Amazon had written that the e-commerce site is discarding its old stock through discount sales so I’m now waiting to see how long mine lasts. I do know from many users in the west that the model 4000 is what they’ve found to be working well.

Must-have Accessories 

My identified requirements from the Dremel tool were to : cut shapes out of acrylic sheets and mdf board; cut crockery; grind tile edges when absolutely necessary, etch ceramic tiles, buff mosaic jewellery, engrave wood etc.

Other than what came with the Dremel tool kit, I’ve bought the following additional accessories from Amazon India:

Dremel 4486 Multi Chuck (0.4-3.4 mm) 

To avoid having to change the collet repeatedly for different bits and mandrels, I decided to buy this multi chuck as it’s believed to work with all the accessories. Its idea is totally welcome but upon using it I found the accessory bit 561 getting dislodged on pressing into the hard surface of an acrylic sheet. I need to use it more often to determine its efficacy but I believe that its price of Rs599.00 makes it a worthwhile item in the kit.

Tools Centre’s 22 mm 10 Mini Diamond Saw Blades with 2 Shanks

Diamond blades are essential for cutting ceramic or china crockery with Dremel. Instead of buying Dremel’s expensive original diamond blade priced at Rs3500/piece, I decided to give this set of 10 blades a chance. The set came at Rs660.00, and till now, I’ve used one out of them to cut 4 shapes out of a 4 mm acrylic sheet. I found the blade to be more effective than any other bit in my original kit.  I’m sure they will come in handy for varied materials in the future. I’m just curious to see the longevity of each blade as they say that low priced blades lose their diamond surface rather rapidly. At the price they have come though, one can experiment with them without too much thought.

My First Project 

I’ve wanted to cut mdf and acrylic shapes for a long time. I believe that a Jigsaw or 3-ring saw are most appropriate for cutting mdf shapes but since I’ve wanted to use the Dremel tool for many things that it can possibly do, I decided to cut acrylic shapes with it. After testing the cutting bit 561 and SpeedClick SC456 that came in the kit, I found Tool Center’s diamond blades more effective for cutting the hard 4 mm acrylic sheets. It was tough to handle acrylic sheets as their cutting not only created a lot of acrylic powder in the air, the diamond blade led to slightly burnt acrylic edges. For those attempting this must wear a nose mask and protective glasses. Wearing anti-glass cut gloves may also help as sometimes tiny pieces of warm acrylic fly onto the hand holding the sheet.

The acrylic shapes had residual plastic stuck to their edges that also went away when rubbed against the surface of the diamond blade.

While I’d be cutting more acrylic, I’m not sure that I’d cut them in large numbers. The process is time-consuming and emits a lot of acrylic powder. Two of the shapes, however, have served as substrates for a small sun-catcher for my yard.

I wish… 

There is lots that isn’t in favour of buying this tool in India. It is pricey; Bosch Limited doesn’t do much to want to sell it (my calls and emails to them didn’t get me any response); Dremel tool’s original accessories are not only expensive, many times they aren’t even available online; Dremel-India’s website isn’t as informative as Dremel.com; Amazon India has far less product data available against the item/accessories than say Amazon US; its videos on Youtube or the company site are mere promos and not educative… And yet, hobbyists or artists in India have been buying the tool because of its perceived potential. Many glass artists I’ve connected with tell me that they bought it thinking that it’d help with many tasks but their prime use of it is to drill holes in glass, an essential need to create many stained glass objects.

I wish Dremel.com was doing much more to facilitate the tool’s handling and help learn the use of its accessories through better videos and live workshops. I believe I’ve watched every single video that’s available on it on Youtube but I still wasn’t entirely sure of the blade that would cut acrylic sheets easily. The Dremel India website doesn’t even allow search for accessories by their model number. One has to use Google to find that accessory’s page on the company website.

Useful Learning Resources

I found these sites to carry some useful views and advise that may help others too.

https://dremelamateur.wordpress.com/2013/01/02/my-dremel-4000-review-part-i/
https://dremelamateur.wordpress.com/2013/01/15/my-dremel-4000-review-part-ii/#more-388
https://www.eternaltools.com/blog/complete-guide-to-your-dremel-rotary-tool
http://dremelweekends.com/pvc-lamp.html
http://jmbh.org/DremelTute.html
https://blueroofdesigns.com/2009/08/07/dremel-resources-for-artists/
http://woodarchivist.com/310-choosing-power-carving-bits/

Do you use a Dremel tool? Do share your experience on its use and how it’s made your work easier.

Mosaic Supply Store: Sai Mosaic Art 

Background 

The need to source tools and tiles for mosaics has meant much web-trawling for me and on one such scan of Amazon India, I’d found small kits and stocks of crystal glass tiles being sold by Ahmedabad based Sai Mosaic Art. I found their website, emailed them to ask about their products, and if they would make them available to small scale mosaic-makers like me. I kept learning more about their products bit by bit. Not only that, a few weeks later, the company owner Mr. Patel spent a morning in Gurgaon while on the way to UP and met me and a few more mosaic-makers.

Mr. Patel made notes of our needs and approach to creating mosaics, said that he’d be keen to help small artists scattered around the country, and later shared with us a list of products, their pricing and minimum quantities that his company would supply. Apart from the adhesive, I’ve now used all their products listed below and can confirm that they indeed fulfil many requirements. Other than a wide range of glass and ceramic tile shades, their mesh is of good quality and works as intended. I’d bought a few small mesh pieces from Amazon US and paid much more than the rate offered by Sai. At least 2 of the 4 picks they sell are invaluable and at the price they come, those of you conducting workshops can easily keep 4-5 sets.

Sai Mosaic Art’s current product range:
(with the minimum permissible order per item)

  1. Crystal glass tiles in 15×15 mm size and 3 mm thickness – 1 sqft or approx 400 tiles
  2. Ceramic tiles in varying sizes in 5 mm thickness –  500 gms in size 1×1” with approx 80 pieces to fill 9×9” space img_3478
    . 12 pieces in size 4×4”
    . 4 pieces in size 6×6”
    . 2 pieces in size 12×8”
  3. Mosaic mesh by meter – 1×1 meter
  4. A set of 4 mosaic picks – 1 set
  5. Adhesive—white glue for indoor mosaics
  6. 3-board shade kit in ceramic tiles
  7. 8-board shade kit in crystal glass

Method of Buying  img_4001

. Email the tile codes with quantities to Sai Mosaic Art.
. Include your complete address and contact numbers in your email.
. Await confirmation via email on stock availability, time to be taken to despatch the items and the final amount to be paid.
. Transfer the amount to the seller’s bank account.
. Await the courier.

Where stocks are available, it takes upto 7 days to have the material in hand.

Contact Information  img_4003

Sai Distributors Pvt Ltd
A/7, SF, Millennium Plaza, Mansi Circle
Vastrapur. Ahmedabad 380 015
Gujarat, India
Ph:- +91 79 40009386
Fax:- +91 79 26764962 img_4004
Cell:- +91 98 25073678
http://saimosaicart.com/
EMAIL: saidistributors7@gmail.com

Further Tips from Me 

Crystal tiles: When you see the beautiful crystal shades on their website, you’d be tempted to acquire small stocks of all the colours for they look like jewels and cut easily with wheeled nippers due to their 3 mm thickness. They look smaller than 15x15mm because of their rounded corners so many mosaicists would be happiest using them without cutting. In fact the shiny SPR tiles must be used whole because of the gold foil used at the back but the rest of the marble or luminescent tiles cut well. My tip is to buy one sqft in each of the 5-6 colours that you’re absolutely sure of using and buy a set of shade boards at the same time. When seen up-close, the iridescence or luminescence of tiles is much clearer than their images make them appear so it helps to have the boards on hand to decide on colours. Place the rest of your tile order on getting hold of the shade kit.img_4006

Ceramic tiles: the smallest size available is 1×1” and they arrive in a perfect state in the courier. Bigger sizes tend to see some breakage but the company is good about replacing any broken tiles so don’t lose heart.

Mesh: The quality is good and even though it arrives folded, it straightens without much effort. img_3329

Picks: They are a must-have in every mosaicist’s kit.

Click on the images to see their bigger size.

How to Start Making Mosaics

Note: This post is concurrently published at http://www.jyotibhargava.com

My previous posts attempt to share leads to tools, tiles and adhesives used in mosaic-making but an interested learner may still be flummoxed in the face of choices and may still wonder how to go about making a mosaic. My view is to follow the approach below.

Join a Mosaic Workshop Makingmosaics

If one can find a trainer, making even a small mosaic under guidance
demystifies the process of holding the nippers, cutting tiles, arranging their flow, sticking them and then coming to grips with the messy but all important grouting process. One may have How-to Project books, good Net bandwidth to watch video tutorials but there is really nothing as ideal as learning by doing it under guidance.

Since the last year that I’ve been running the Facebook group Mosaic India, I’ve learned of a few India based mosaic-makers who train as well. If you wish to connect with a trainer, join the FB group and enquire about trainers in  your city.

Learn to cut Stained Glass 

India has more Stained Glass practitioners than mosaicists. It may be, therefore, easier to track down a stained glass artist than a mosaic-maker. Reach out to artists in your city, request that they teach you to cut stained glass shapes. Traditional stained glass requires steps of grinding shape edges once they are cut, copper-foiling them and then soldering multiple shapes to create a composition or 3D piece. To make mosaics, a learner can get oriented on scoring and cutting shapes of stained glass, and then move on to the steps of sticking shapes and grouting the composition.

Buy a Mosaic Kit and Make it 

A small mosaic kit comes with materials and instructions on making a mosaic. The kit doesn’t carry any nippers but it does have pre-cut tiles and other essential items. Making a mosaic using a kit demystifies the basic steps involved in creating a finished mosaic and that can get many learners going onto more. In India, I’ve heard of only 2 sources of basic kits but on Amazon US I can see 8-10 kit options. They don’t ship to India but any friend from the US may be asked to bring you one.

Offer to be a Mosaic-maker’s Assistant 

Even those mosaic-makers who do not run workshops or teach in one-on-one sessions, may value help to finish their commissioned pieces. Be on the lookout for such opportunities to learn as you assist.

Just Make It 

If you have none of the above options available to you, just make a mosaic based on your understanding from How-to books or videos and get going. Ask questions, share your experience of making your first mosaic in the FB group and keep taking leaps beyond.

In the next post, I’ll describe the exact process of making a simple mosaic to help remove any further hesitation that a beginner feels.

Mosaic India Group on Facebook

Note: This post was first published on February 7, 2016 at http://www.jyotibhargava.com


Other than documenting in this blog what I’ve learned on mosaic tools and more, I’ve started a group on Facebook to encourage new mosaicists to seek inputs on their work or ask questions. There is still little orientation available to adequately learn the art of mosaics in India that I’m hoping this budding community to provide a good mentoring ground to further mosaic learning and making. Those who are running workshops can also be tracked through it. As good art is being created, avenues for marketing it can also be identified by members of the group. The group members are both India based and international to bring in their advance and varied experience. Besides, I share inspiring feeds on mosaic artists, sites, blogs and mosaic methods to maintain the atmosphere of learning and knowing more about mosaics.

Anyone with little or advance experience in mosaic-making will benefit from being part of the group. Come join it if you’re a mosaicist in India or with interest in connecting with India based mosaicists.

https://www.facebook.com/groups/MosaicIndia